I enjoy making up electronic kits and also I am a fan of the Arduino, now its very easy to build one on a breadboard with schematics available on the internet and its not that difficult to create a board and make your own version.
That being said I noticed an Arduino Uno which had an option which allowed you to buy a kit of parts and that for the ridiculously low cost of under $5
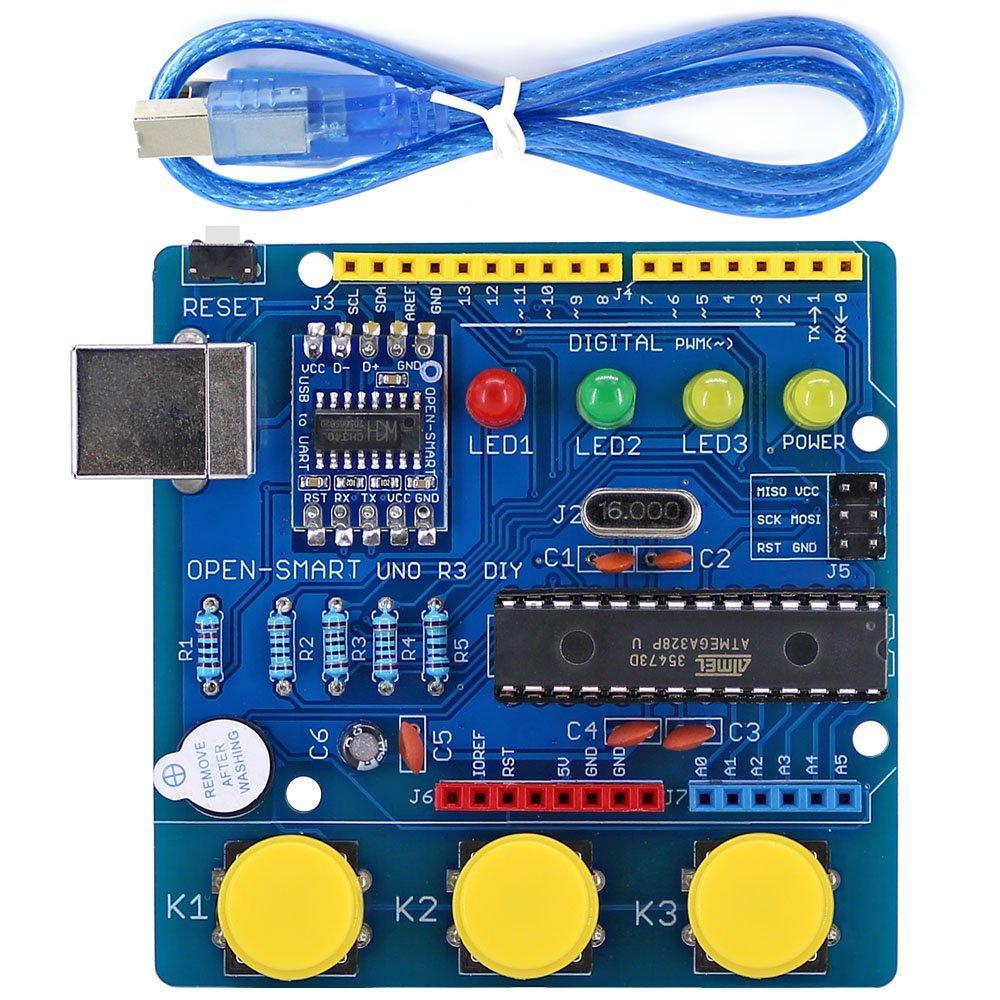
Here is a picture of the completed kit
Features
Included ATmega328P-PU has been burned UNO R3 bootloader;
– Includes CH340 USB to UART module compatible with win7, win8, linux, MAC OS;
– Includes 3 Programmable LEDs which connect to D13 / D8 / D7
– Includes 3 Buttons which connect to D4 / D3 / D2;
– Includes 1 Buzzer which connects to D6
– Includes 28PIN-DIP socket so you can replace the ATmega328
– Includes a Crystal oscillator socket, so you can replace it
– compatible with UNO R3E.
– Microcontroller: ATmega328P-PU
– Operating voltage: 5V
– IO interface logic voltage: 5V
– Operating Current: 500mA (max)
– Digital I / O pins: 14 (of which 6 can provide PWM output)
– Analog input pins: 6
– Clock frequency: 16MHz
– Onboard power indicator.
– Bootloader burning Interface: ICSP
Parts List
There is a red PCB and blue PCB option, the price is the same for both of them
| Description | Link |
| Blue Kit | OPEN-SMART UNO R3 DIY Soldering Parts Kit – Blue |
| Red Kit | OPEN-SMART UNO R3 DIY Soldering Parts Kit – Red |
This is what you will receive, I actually got 2 xtals, 2 extra LEDs and a couple of extra resistors as well
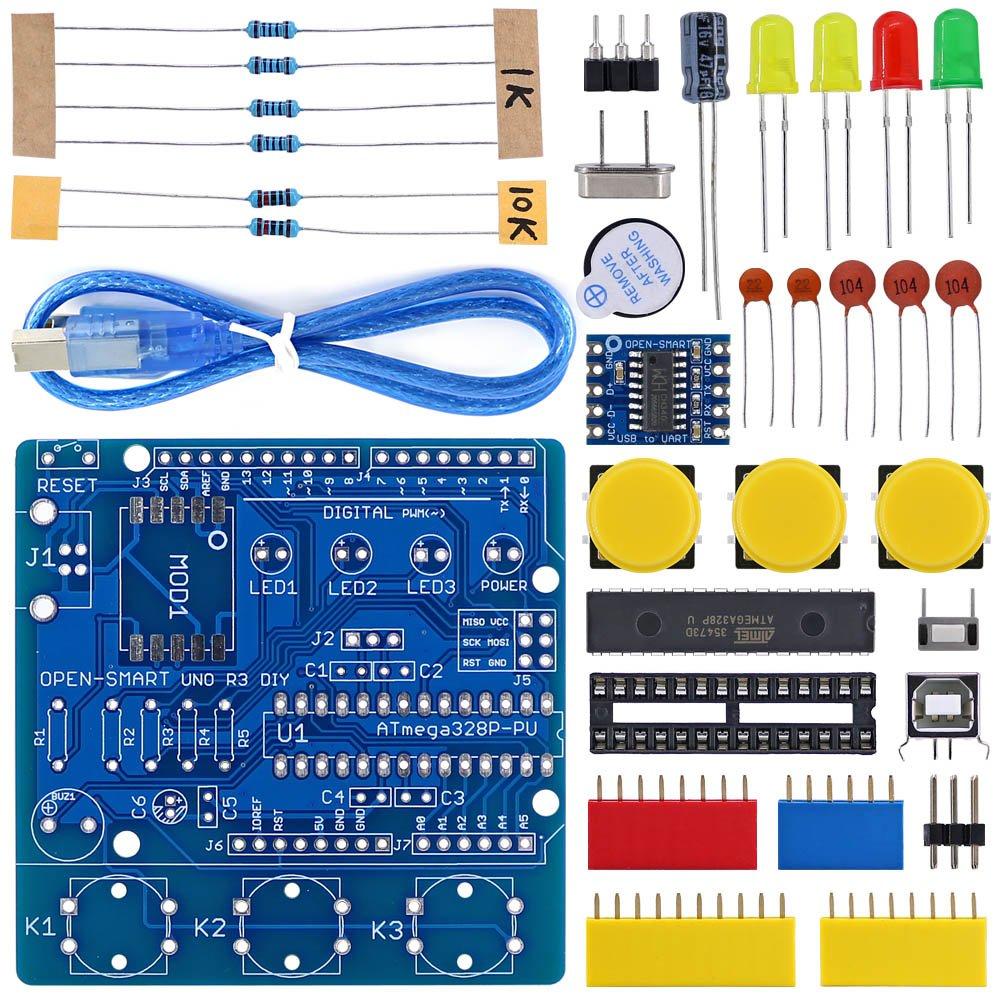
OPEN-SMART UNO R3 DIY kit
Instructions
I have borrowed these instructions from the store listing
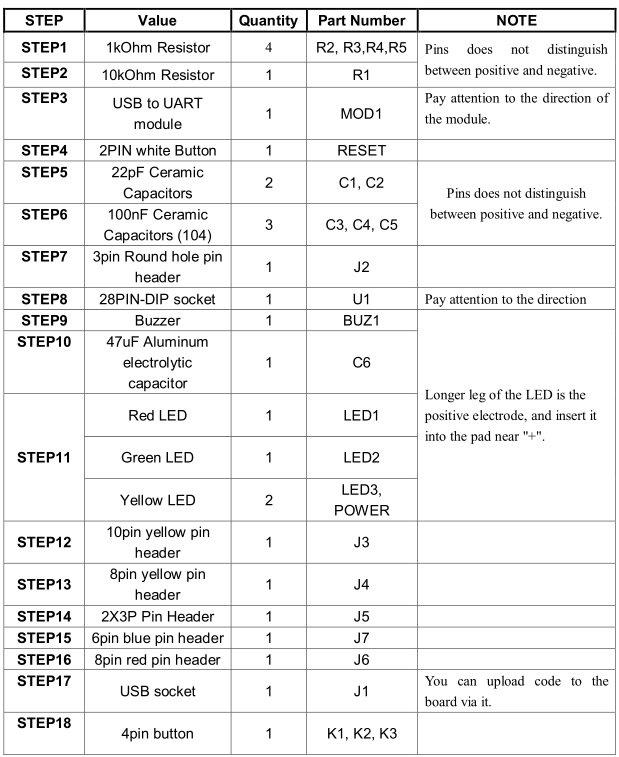
Solder in the order shown in the following table:
Then, you can plug the 16MHz crystal oscillator into the 3pin Round hole pin header called J2.
And then, you can plug ATmega328P-PU onto the 28 PIN-DIP socket, please pay attention to the direction and be careful not to bend the pins. After you have done all of the previous steps, you can use it as the ATmega328P-PU has a bootloader on it.
Testing
The blink example is always the easiest way to test, the Arduino should be detected and the LED1 should flash on and off. That’s a good start.
int led = 13;

// the setup routine runs once when you press reset:
void setup() {
// initialize the digital pin as an output.
pinMode(led, OUTPUT);
}

// the loop routine runs over and over again forever:
void loop() {
digitalWrite(led, HIGH); // turn the LED on (HIGH is the voltage level)
delay(1000); // wait for a second
digitalWrite(led, LOW); // turn the LED off by making the voltage LOW
delay(1000); // wait for a second
}
Once done, compile and upload the example and the LED will flash on and off
Summary
A very easy to kit to make with no SMT parts, a professional quality PCB and the price of under $5 for the kit. Sure its fun to make your own Arduino but this is a great option to think about.
You can also purchase a made up kit if you cannot be bothered with the soldering practice
Documents
OPEN-SMART UNO R3 DIY Schematic